Tuesday, August 30, 2011

Why I Love Richmond


Simply put, I love Richmond.  I loved growing up here, and I love living here as an adult.  Sure, there are other places I've thought would be great to live (NYC, Boston, Southern Cali, Denver, Portland, and many more).  But... Richmond is home.  Even if I moved to one of the amazing previously mentioned locales for awhile, I'd be back.  Partly because my family is here (I can't live too far from them... it just doesn't work for me), but also because I love it! 


When Centsational Girl announced her "Favorite Things in My Town Party", I thought it would be a fun excuse to write about my beloved RVA (RIC if that's your preference).  Technically, we actually live outside of Richmond.  We lived in a house in the north side of the city after we got married and I L.O.V.E.D it.


I really wanted to stay within the city limits when we decided to buy, but after realizing our options were realllly limited (by our budget) and we found this great deal on our house... it just made sense to be in the county.  Luckily, we are just 10-12 minutes from downtown so it is not a huge sacrifice!

 Main Street Station

The very best thing about Richmond is its proximity to the beach and the mountains.  We can spend a day in Virginia Beach or go snowboarding at Wintergreen after just an hour & a half or so of driving.  It cannot be beat.  There are also two theme parks within an hour, and Washington D.C. and Baltimore are just about 2 hours away.  So many great day trips!

July 4th in D.C.

Richmond is truly rich in history, too.  There are a bazillion historical landmarks, not to mention an infinite amount of Civil War battlefields and landmarks (if that's your thing).

We have amazing museums (from the Virginia Museum of Fine Arts to the Poe Museum, to the Science Museum and 2 Children's Museums) and art galleries, too.  My favorite gallery is also my favorite place to buy gifts in Richmond, Quirk


I could do an entire post on art galleries in town, most of which participate in our First Fridays Art Walk.  Who doesn't love an excuse to spend Friday night downtown admiring local artists' work?

Another amazingly awesome thing about Richmond is the James River.


The river means so much to us... from rafting trips to kayaking; from lounging on river rocks to fishing along the banks; from running along the flood wall to hiking on the islands... you get the idea.  The James gives us gorgeous scenery and more recreation than any one person could ever fully appreciate.  We love to hike, bike, and go to concerts and special events on one of our islands.  We had fireworks by the river this year and they were phenomenal.

You are likely to be able to find some kind of festival almost every weekend.  Some of the best times I've had are at big events that attract Richmonders of all ages & backgrounds.  Whether it is at a music festival (like our Folk Festival) or a food/wine festival (we have lots of those) or an athletic event (our Monument Ave. 10K is one of the biggest races in the country)... there is just nothing like being in a huge crowd of Richmonders just loving and enjoying our city.

my friend Courtney & I running the Richmond Marathon

Richmond is an ideal place to live if you are a runner (or biker).  I have discovered some of my favorite spots in the city during a long run.  We have training teams for all the big races, and it's great to learn new routes through the city.  Local races like the Monument Ave. 10K and Richmond Marathon are so much fun because they bring SO many people together in our city.  


Clearly I could go on and on.  We have amazing shopping (Carytown is a fav. of many Richmonders... lots of fun local shops and eateries along Cary Street, as well as an awesome old theater, The Byrd).  You could spend an entire day just admiring the architecture of various buildings and houses... from our gothic old City Hall to the new Virginia Museum of Fine Arts addition to the gorgeous houses in Ginter Park and along Monument Avenue.


Another fun place to spend time is in Shockoe Bottom or Shockoe Slip, smack in the middle of downtown and close to the river.  You can walk along the old cobblestone streets (seen above in a photo from our engagement shoot).  There are phenomenal restaurants, the most amazing modern furniture store (LaDiff), and access to the Canal Walk.  You can also take a tour on a canal boat, which provides some history and great views as it glides down the canal and alongside the Holocaust Museum and all the old warehouses, which are now lofts.


So, in the interest of time I think I'll stop here.  Like I said though, I could obviously keep going.  There are so many great things about Richmond!


If you're ever here for an extended period of time, I would certainly recommend taking in a festival or two, walking along the river (maybe along the Canal Walk, Flood Wall, or on Belle Isle), checking out the VCU campus and Hollywood Cemetery, going to the VMFA or Science Museum or other museums, taking an art class at the Visual Arts Center, going to Maymont Park or Lewis Ginter Botanical Gardens, driving along Monument Avenue, shopping in Carytown, eating in Shockoe, and (if you're lucky enough to be here in December), taking a limo or driving yourself through part of our Tacky Light Tour.  The fun just never stops. :)


skyline pic from here, Quirk collage from here, river from here, 10K from here, footbridge here

Sunday, August 21, 2011

Beach Bums

Well, my summer break is officially over as of tomorrow morning.  Can't wait to sit in a meeting from 8am-4pm! :)  I have quite a few things to blog about, including a painted piece of furniture, a new wall of frames, painted doors, and new window pelmets/valances in the office.  But... I'm not writing about those things tonight.  


We just spent the most relaxing week & a half in the Outer Banks and I'm still "gone to Carolina in my mind" (as the wonderful James Taylor would say).  


We crashed my parents' vacation for a few days at my cousin's amazing beach house, and my awesome older brother joined us there, too.  It was wonderful!  We then moved down the road a mile or so to spend a week with our good friends, Courtney & Eddie.   


It was amazing to spend 11 days at the beach (who doesn't love the beach?), especially with great company!  


I was very prepared to relax by the pool/on the beach and catch up on some reading.


I read all but one of those books, and enjoyed every one!  Tomorrow will be a bit of a rude awakening, but I'm sure I'll be back in the swing of things in no time.  Here's to hoping I can keep up with the blog as the school year begins!


Tuesday, August 2, 2011

Tangly Dangly Earrings No More

For a long time, I had no interest in "dangly" earrings.  I'm not sure why (I think it drove my mom crazy), but I just didn't like the way they looked.  I would always wear the same silver ball posts.  I still wear those posts most days, actually.  


Times have changed, though, and now I am loving the look of fun dangly earrings.  As I've started to accumulate more pairs, I've just been sticking them haphazardly in my jewelry box.  No sense of organization, whatsoever.  Which drives me crazy.  When I saw this on Pinterest, I knew it was a perfect, easy solution to my problem!


There is an easy-to-follow tutorial here, which is exactly how I made mine.  My favorite tip from Amanda's tutorial is that by twisting two or three strands of picture wire together, you can also attach post earrings to the wire.  As you can see in my finished product below, I stuck in a pair of my fav. silver ball posts on the bottom row.


I plan to hang mine in our closet, along with a necklace holder whenever I get around to making one.  I recently pinned this one on my To Do board that is made from a towel bar and shower curtain hooks.  It is a likely candidate!  


When I hang the earring holder, Stephen said he has some molding that we can use behind the frame, since if we hang it flush against the wall, the earrings would be flattened and it would be tough to use.  I can't wait to fill it up with even more fun earrings! 

Saturday, July 30, 2011

Sew Much Fun - Camera Straps

In December (yea, as in last YEAR), I decided that I wanted to make a cover for my camera strap.  


I saw them all over the "blogosphere" and figured they couldn't be too difficult to make.  I even gave my sister one for Christmas.  Actually, I gave her an IOU coupon for one since I didn't have any made in time for Christmas!  

Fast forward 6 months (ridiculous) to this summer, and I finally make the time to sew a few strap covers.  They were fun to sew, and didn't take too terribly long either.  


The ones without the ruffles took less than a half hour each, including the cutting, ironing, and sewing.  The ones with the ruffles took closer to an hour.  I roughly followed tutorials from here and here.


The one above was nice because the ruffles are actually ribbon from Hobby Lobby.  Time saver!  I also bought some wide grosgrain ribbon to try as an accent... whenever I get around to making more.  


I gave away a few of them, but still have a few to switch out on my own camera.  Fun!  Next up on the sewing table:  roman shades for the french doors, a window valance for a friend's classroom, and some sort of window treatments for the office.  Maybe a couple of new pillows, too.  Sew fun :)
Friday, July 22, 2011

'Our House' page

So... this blog was started with the intention of posting pictures about the work we have done and continue to do on our home.  However, I don't think I've even posted about half the rooms in the house!  Since I refuse to pressure myself to blog about each and every room right away, I figured I could at least post pictures of our house to buy myself some time.  


Instead of writing one realllyyyy long post, I made a new PAGE!  That's big stuff for me.  You'll notice at the top of the page (right under the huge teal header), there is a new tab called "Our House".  


It is one long page with before and after pictures of each room in our house.  Fun :)  There are a few links to past posts about some of the rooms, and if/when I post about rooms in the house, I'll add those links, too.


As I kind of mentioned above, I'm not going to let myself feel pressured to update all the time and make this a superblog, even though I would like to update constantly and keep it 'fresh'.  But, it's just not fun if you feel like you have to do it!  I also decided that it's okay for me to write about anything; it doesn't have to be house-related.  In fact, posting about teaching-related things seems to be much more popular! 


So, I might post about house stuff, or teaching stuff, or personal stuff... whatever is going on in our lives at the time.  After all, this is the perfect way to document our memories! 

That's my story and I'm sticking to it.

Thursday, June 30, 2011

Fan of Sea Fans

A couple of months ago, during one of our fairly regular stops at Home Goods, Mom and I spotted something VERY exciting.  Sea fans!


Well, not that exact sea fan, but 3 different pairs of matching sea fans. !!  I've been looking for sea fans to frame for a couple of years now (I could have ordered some online, but never found the right ones for the right price), so you can imagine my excitement when they were just sitting on the shelf.  Mom bought two large white/beige-colored fans, and I got two smaller yellow ones for just $5.99 each!


We finally went to Ikea to get frames this past weekend.  We also picked up some fabric for the background of our frames while we were there.


As soon as we bought them, I knew right away that I wanted to hang them on either side of the window in our breakfast nook.  Our pendant light has a similar accent color in it, so I was hoping it would work perfectly.  After replacing the mats with fabric-wrapped poster board, I just stuck the sea fans in what looked like the middle of the frame, put it all back together, and voila!


So much better than the bare naked walls (as seen below, obviously in the winter). 


I love it.  Eventually we'll do something to the long wall on the right, too... maybe a white plate wall?  My (very) long-term plan is to try to do a banquette under the bay windows and move the table and light over, and have some type of sideboard/buffet along the wall on the right.  We'll see! 

sea fan picture from mexfish.com

Tuesday, June 28, 2011

Bathroom Reno

Happy Summer!  Obviously, I have a hard time posting when school is in session, but now that we are out for the summer, I am back! 

As I mentioned in the last post, much of our "reno energy" has gone towards Mom & Dad's house in the last few months.  They finished their addition & kitchen, with just the exterior left to complete.  In February, Dad went on a 5-day retreat and true to form, Mom was dying to do some sort of house project while he was gone (she loves to surprise him!)  She recruited Stephen to help her renovate their old bathroom, now that they have a second full bath.  


Yea, it was rough.  The terrible lighting doesn't help, but it was bad.  It was pretty much impossible to describe the color of those tiles.

Although we knew it was a bit of a lofty undertaking (we knew it wasn't quite possible to finish it in just a few days, when Stephen and Mom both still had to work every day), she figured they would give it a shot and see what they could do!  

Stephen and his dad spent the first day just doing demo.  It was a mess!  They ripped out the tile that was on ALL of the walls, as well as the concrete and metal mesh that was behind it (the real pain).  The floor was just as fun to rip out, and that was finished on the second day.    


Ripping out the tile was easy; it was ripping out this stuff that was tough and time-consuming!


After he replaced some rotten boards in the floor, Stephen spent the next couple days putting in a new tub, installing cement board for the shower tile, and putting in green board (sheetrock) where the walls were tiled, as well as where there was a doorway into my old bedroom.  That entrance really wasn't needed, so they got rid of it!  Mom helped with the demo, and worked on painting the linen closet and its shelves, as well as picking out the new tile and fixtures. 

They also needed to change how the baseboard heat was configured in the room, so Stephen spent a lot of time running new lines for that (I'm sure there were other things involved, too, I just don't know what they are!)  He also got the shower tile finished before Dad came home from his trip, but he still came home to a mess!  I won't say he was thrilled at the surprise, but he jumped right in to help finish it up, and after a few more days of work from all of them, it was done!


Apologies for the terrible lighting (I will learn how to white balance), but you can tell what an improvement it is!  The floor tile is mostly brown (not nearly as green as it looks in the photo), and the wall color is a little lighter than it appears.  The new vanity is just like the one Young House Love did in their new bathroom last year.


Before: the door on the left went into my old bedroom.


After: no more door!  So much better.  Mom & Dad's house now officially feels brand new!

Thursday, February 10, 2011

Mom & Dad's "After"

While we've still been piddling around with projects at our house (and surely will never stop), lately a lot of our "DIY energy", if you will, has gone towards Mom & Dad's house.  They set out over a year ago to add on to the back of their house.  I couldn't resist going ahead and posting a couple of "before & after" shots... the difference is amazing!


Those two pics. were taken from the exact same place, a year apart.  The first photo isn't quite a "before" shot, since you can already see the construction through the windows, instead of the pretty outside view that you previously saw.  Also- notice Mom's "design board" on the table... crucial!

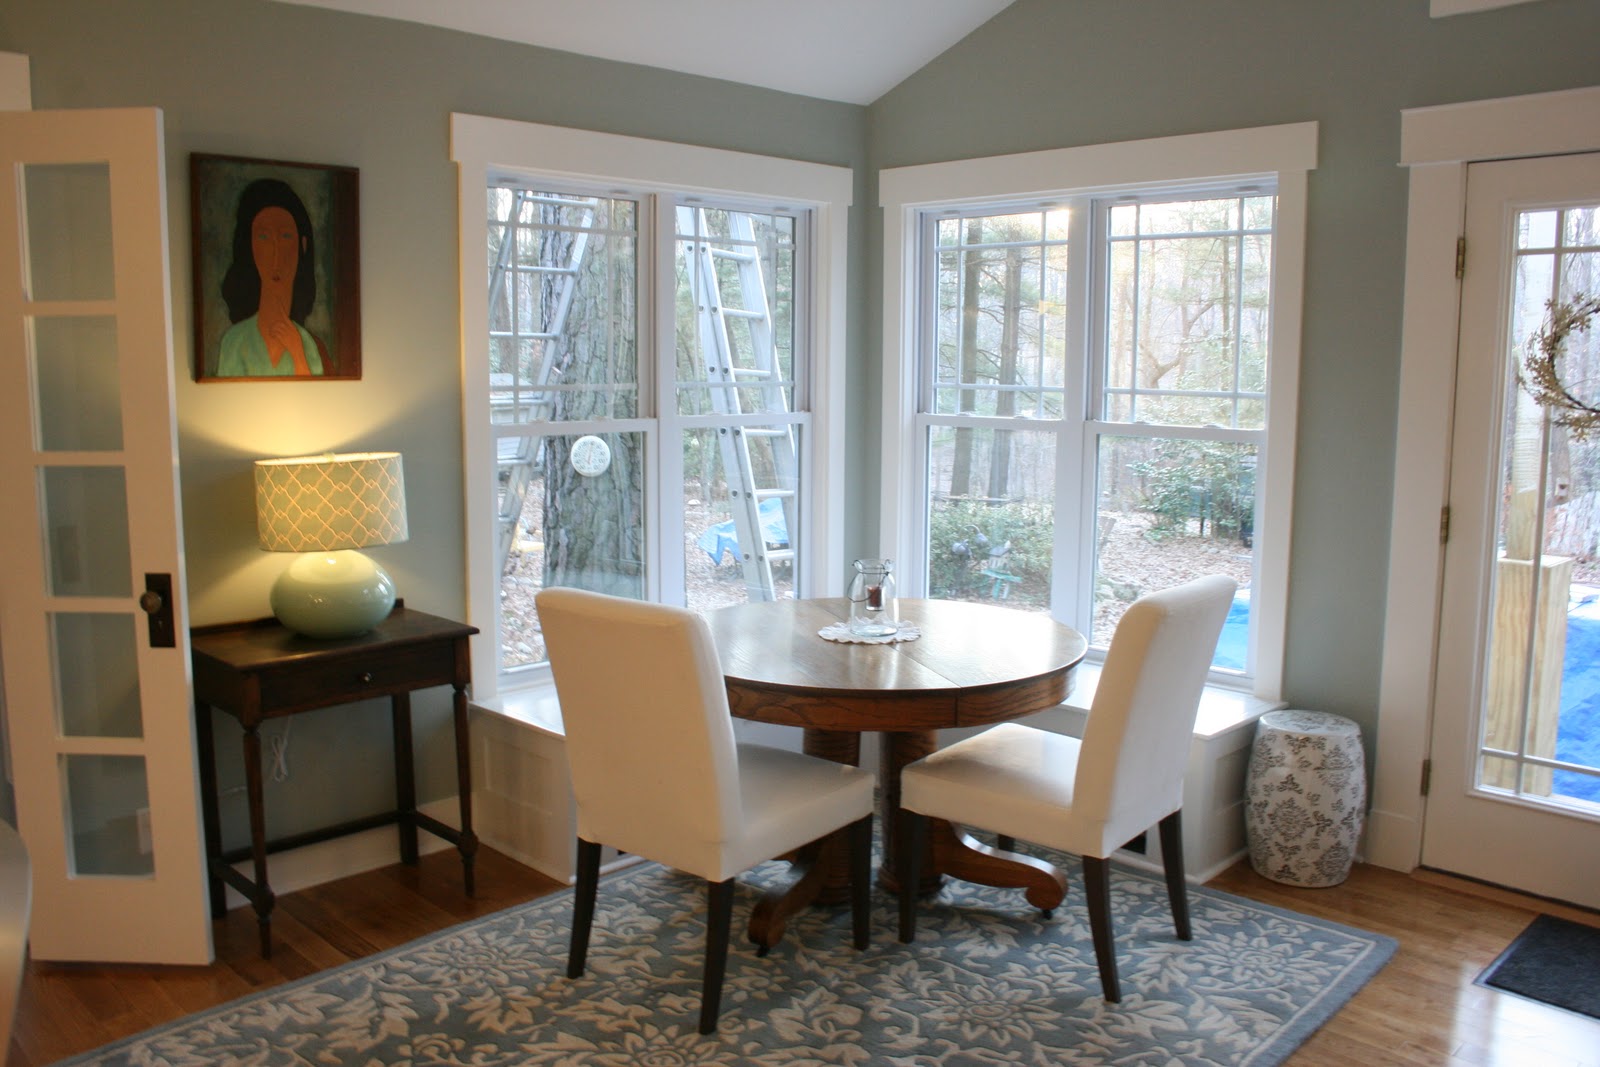
So basically, they added a sunroom (for lack of a better term) on to the kitchen, as well as a mudroom, two closets, and a full bathroom.  They completely gutted the old kitchen and changed a few walls around to make the whole new floor plan work.  It is all gorgeous and finally in the finishing stages.  

 These two photos were also taken from the same angle (the first shot was taken through the torn-out windows, standing in the new space).  They closed up and extended that half wall to create a stairway and create a wall for upper cabinets & a range hood.

 On the french doors... we bought reclaimed door knobs and Dad painted door plates that he's had for years and put them together... LOVE how it turned out.

Besides some help with the initial building & framing from an architect, wiring help from an electrician, and Stephen's plumbing services, they have done it all themselves!  Since they both work way more than 40 hours a week, everything has been done on the weekends and occasional evenings.  Hence the long, but so worthwhile, process.  


All they really have left to do is to figure out some furniture & its placement, pick fabric & sew cushions for the window seats/banquette (sewn by me?  by Mom?  We'll see...), a little tile sealing, and some touch-up caulking & painting.  


Of course, now that they have such beautiful new spaces, Mom has been redoing every other room in their house!  The family room/basement has been re-painted (including all trim, the fireplace, and the built-in bookshelves) and is in the process of being decorated.  The "TV room" has also been painted, along with the hallway and living room (which now has two arched "windows" into the kitchen, thanks to busting a couple huge holes in the wall).  

 Obviously the decorating is in-progress.

 Babies.

Mom & Dad's bedroom also got new flooring, paint, bedding, rug, etc. in the process.  All of the artwork and accessories are still in-progress, but they have done so much! 

The new "master bath", with the new closet behind it leading into Mom & Dad's room.  Almost done!

It's been quite the undertaking, and it's not over yet!  So exciting.
 
Designed by Lena