Showing posts with label before and after. Show all posts

Saturday, September 15, 2012

Laundry Room

I already posted about my favorite part of the laundry room (the ceiling)... every last detail about it.  So now, here is the rest of the room!

This was our lovely laundry room when we first moved in to our house (excuse the terrible lighting).  It was the same Duke blue as the kitchen & half bath.  Yikes.


We took down the shelf, painted the walls & trim, replaced the light fixture & flooring, and added some hardware to the cabinets.  We didn't love the layout & weren't sure what to do with the room, so we lived with it like this for awhile (with a new dryer when the old when died). 


Here is another pic with a wider view.  


I searched for inspiration everywhere to try to decide what to do with the room, and eventually we decided that we really wanted the cabinets to be over the washer & dryer...


which meant moving the washer & dryer.  It was not exactly an easy task... but the hubs ran new pipe for the washing machine (and put in a new washer box that will be lower & therefore not visible), patched the wall, then ran a new dryer vent a few feet over from the old one.


We also finally found a good deal on the matching washer to our previously purchased dryer and put them both in their new places on the other wall, and patched & painted some more drywall.  

We decided to fill the extra space on the cabinet wall with shelves instead of trying to buy a third cabinet or larger cabinets.  We wanted the shelves in the middle, so we moved the right cabinet over.


The cabinets got a couple of coats of white paint, and I also painted the crown molding and the molding I bought for the shelves before I put it all up.  We also bought a piece of plywood from a local lumber company and painted it white for the countertop.


I borrowed my dad's compound mitre saw and used it to cut the crown molding, then used our nail gun & air compressor (my new fav. toys) to put it up.  I also cut the molding for the shelf supports and nailed them to the wall & the cabinets, and then used a circular saw to cut the shelving board and put the shelves in place.

I also nailed some molding to the front of the shelves to make them look thicker.  Hubby screwed in supports for the counter and once that was in place, it was just time to caulk, touch-up paint, accessorize, and call it a day!  


Luckily, we also have a shelf and rack behind the door where we can hang clothes to dry.  We also keep our recycling bins and a hamper back there, where it is nicely hidden but handy.

The last finishing touch in the room was a place to keep Hubby's shoes, which always come off inside the side door and have not had a proper home (other than the laundry room floor).  My parents bought this shoe cabinet from Ikea and painted it to put in their entry way.


We bought the same one and totally copied their idea.  We painted it white & added some fun Anthro hardware.  We put a base of 2x4s underneath it to raise it up a few inches so that we could run some extra baseboard around it to give it a built-in look.  We also added some molding around the edges to complete the look.  


It has been great!  It fits perfectly on the wall across from the washer & dryer, next to the doorway.  It can fit 8 pairs of shoes in it, which has been incredibly helpful.  And we love the way it looks, too.  The best part- it was only $30.  You have to love Ikea.

One last comparison of our finished laundry room:


In love!


Monday, July 30, 2012

Kitchen Update

We were hard at work in the kitchen this spring, and are finally finishing it up this summer! We got our new appliances and counter tops, and tiled the backsplash. We are LOVING how it has turned out. It looked like this back in March:


And now:


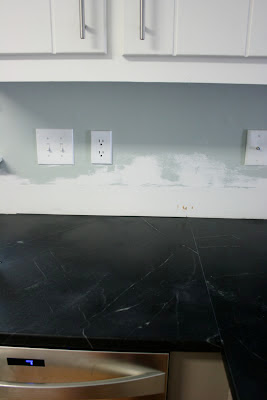
We went with soapstone tops, which we LOVE (just have to keep up with the oiling). Luckily the oiling part is supposed to get easier after the first year, so by then we'll have the look we love without the maintenance. It was really interesting when it was first installed:


After the first coat of mineral oil:


Luckily the shine goes away once you wipe off the excess oil.


Thanks to the old laminate 4" backsplash, our walls were a mess.  We patched, sanded, and decided on a tile:


I love, love, LOVE this tile. I saw it for the first time a couple of years ago (and it was one of the first things I pinned on Pinterest over a year ago), but we couldn't find it online when we started looking, so I didn't think it would be an option. Once we realized that there was no penny tile the exact color we wanted, we went to a local tile showroom and discovered that they could order this one for us! So. excited.


It wasn't the easiest process, although it wasn't so much hard as it was tedious. Thanks to my dad for letting us borrow his wet saw (and every other tile tool)!


We actually worked together pretty well to put it up. Stephen cut with the wet saw while I made smaller cuts with the nippers, and then we took turns spreading the thinset and worked together to line up each piece. 


Then we spent a couple of days cutting all of the edge pieces putting them in before I grouted.  


We chose a sandy-colored grout that looked similar to our lower cabinet color. We wanted something other than white so that the tile shape would stand out, but didn't want it to be an overwhelming busy contrast with a dark grout, either. 

After some caulking and cutting & painting trim pieces to match, it was done! 


We also found a piece of marble for our dresser island, which I am in the process of painting now! We just have to get it cut down a little and have the edges finished, but it will be perfect.


So as of now, our kitchen has gone from this:


to this:


and now to this:


I can't wait to take an updated photo later this week once the dresser is finished (we are painting it the same color as the lower cabinets).


The window seat is almost done and once we get to the electrical work, the whole kitchen will be finished! We added a family photo collage wall above the buffet, which as of now we are just going to leave as-is (it seems to need the warmth of that wood!), but of course that could change in the future. So close to being done!


Sunday, October 30, 2011

Catch Up

Well, as usual... I suck at posting once school starts!  It's been an interesting year so far.  I have some super sweet students, and some super challenging ones, too.  It's neat to see how much progress so many of them have already made. 

This is my attempt to catch up... you could also call it a camera dump.  Or just a picture dump, since quite a few of the pics are from my phone!  Apologies if the quality is lacking, but I just haven't gotten around to taking any nice photos.  


Over the summer, I moved our DVD cabinet up to the office so it could be with the 2 others that match it (excuse the Chrismtas pic...) and replaced it with this little chest.


It wasn't in the best shape,

but after some sanding, paint, & poly, it fits right in. 


 The yellow lamp was a little much on the yellow chest, so I gave it a coat of black spray paint.  I'm not sure I love the black lamp & white shade... so we'll see.  It will probably change.


Before I put the paintbrushes away, I also painted a mirror for the hallway bath (also known as Boston's room).  Mom & I found the mirror at a consignment store; it was originally black.  I tried spray painting it a blue shade, but it just wasn't the right color.


I picked up a sample tub of a color closer to the teal in the shower curtain, and it was much better.  


While on a painting roll, we also painted the interior of the front & side doors black.  They looked fine white,


but I really love the contrast of the black!  


I also made a fun gift for a friend's bridal shower using this awesome flickr collection of letter pics.


It was fun to make and I really liked the result, so I made one for us, too!  It became part of our new hallway gallery wall.


The last project I took on before the school year began was finally making some sort of window treatments for the office.  After lots of thought (like 2 years worth), I finally decided to make cornices/pelmets for both windows.  


I knew I wanted orange & white fabric and finally found some I liked at ufab (best fabric store ever).  After debating how to make the boxes themselves, I finally decided to use purple foam insulation board from Home Depot (I wanted something lighter than wood, but a little more sturdy than foam core, which I've seen quite a few bloggers use with great results).  I love how they turned out (although again, excuse the phone-quality pics).


Right now, we are working on a project that I thought we wouldn't tackle for awhile, but hubby surprised me one day by starting it!


I'm so excited; I always thought it would be the perfect place for a banquette/window seat!  Plus, it will give us a little extra storage, which is always nice.  Stephen added some trim and is working on painting it white.  Now it's my turn to sew the cushion... should be interesting!  It'll definitely be the hardest sewing project I've undertaken so far.  


The plan is to shift the table over (and move the light over as well), 


then add some sort of sideboard or buffet on the right wall for even more storage!  Yay.

So how's that for a crash update!?  It'll do for now.  My plan is to try to post a little more often, even if I have to make them short and sweet.  We'll see how it goes!

Friday, July 22, 2011

'Our House' page

So... this blog was started with the intention of posting pictures about the work we have done and continue to do on our home.  However, I don't think I've even posted about half the rooms in the house!  Since I refuse to pressure myself to blog about each and every room right away, I figured I could at least post pictures of our house to buy myself some time.  


Instead of writing one realllyyyy long post, I made a new PAGE!  That's big stuff for me.  You'll notice at the top of the page (right under the huge teal header), there is a new tab called "Our House".  


It is one long page with before and after pictures of each room in our house.  Fun :)  There are a few links to past posts about some of the rooms, and if/when I post about rooms in the house, I'll add those links, too.


As I kind of mentioned above, I'm not going to let myself feel pressured to update all the time and make this a superblog, even though I would like to update constantly and keep it 'fresh'.  But, it's just not fun if you feel like you have to do it!  I also decided that it's okay for me to write about anything; it doesn't have to be house-related.  In fact, posting about teaching-related things seems to be much more popular! 


So, I might post about house stuff, or teaching stuff, or personal stuff... whatever is going on in our lives at the time.  After all, this is the perfect way to document our memories! 

That's my story and I'm sticking to it.

Thursday, February 10, 2011

Mom & Dad's "After"

While we've still been piddling around with projects at our house (and surely will never stop), lately a lot of our "DIY energy", if you will, has gone towards Mom & Dad's house.  They set out over a year ago to add on to the back of their house.  I couldn't resist going ahead and posting a couple of "before & after" shots... the difference is amazing!


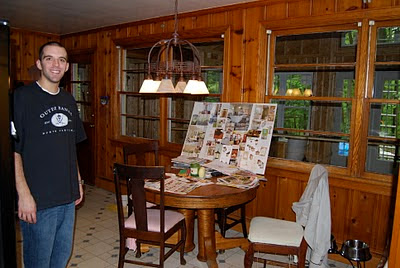
Those two pics. were taken from the exact same place, a year apart.  The first photo isn't quite a "before" shot, since you can already see the construction through the windows, instead of the pretty outside view that you previously saw.  Also- notice Mom's "design board" on the table... crucial!

So basically, they added a sunroom (for lack of a better term) on to the kitchen, as well as a mudroom, two closets, and a full bathroom.  They completely gutted the old kitchen and changed a few walls around to make the whole new floor plan work.  It is all gorgeous and finally in the finishing stages.  

 These two photos were also taken from the same angle (the first shot was taken through the torn-out windows, standing in the new space).  They closed up and extended that half wall to create a stairway and create a wall for upper cabinets & a range hood.

 On the french doors... we bought reclaimed door knobs and Dad painted door plates that he's had for years and put them together... LOVE how it turned out.

Besides some help with the initial building & framing from an architect, wiring help from an electrician, and Stephen's plumbing services, they have done it all themselves!  Since they both work way more than 40 hours a week, everything has been done on the weekends and occasional evenings.  Hence the long, but so worthwhile, process.  


All they really have left to do is to figure out some furniture & its placement, pick fabric & sew cushions for the window seats/banquette (sewn by me?  by Mom?  We'll see...), a little tile sealing, and some touch-up caulking & painting.  


Of course, now that they have such beautiful new spaces, Mom has been redoing every other room in their house!  The family room/basement has been re-painted (including all trim, the fireplace, and the built-in bookshelves) and is in the process of being decorated.  The "TV room" has also been painted, along with the hallway and living room (which now has two arched "windows" into the kitchen, thanks to busting a couple huge holes in the wall).  

 Obviously the decorating is in-progress.

 Babies.

Mom & Dad's bedroom also got new flooring, paint, bedding, rug, etc. in the process.  All of the artwork and accessories are still in-progress, but they have done so much! 

The new "master bath", with the new closet behind it leading into Mom & Dad's room.  Almost done!

It's been quite the undertaking, and it's not over yet!  So exciting.
 
Designed by Lena